The color French manicure is a trend that has been gaining in popularity in recent years. It involves giving a touch of originality and fantasy to the traditional French manicure by playing with colors and patterns. In this article, discover how to achieve a successful colored French manicure and explore some ideas for varying the pleasures.
The basis of French manicure
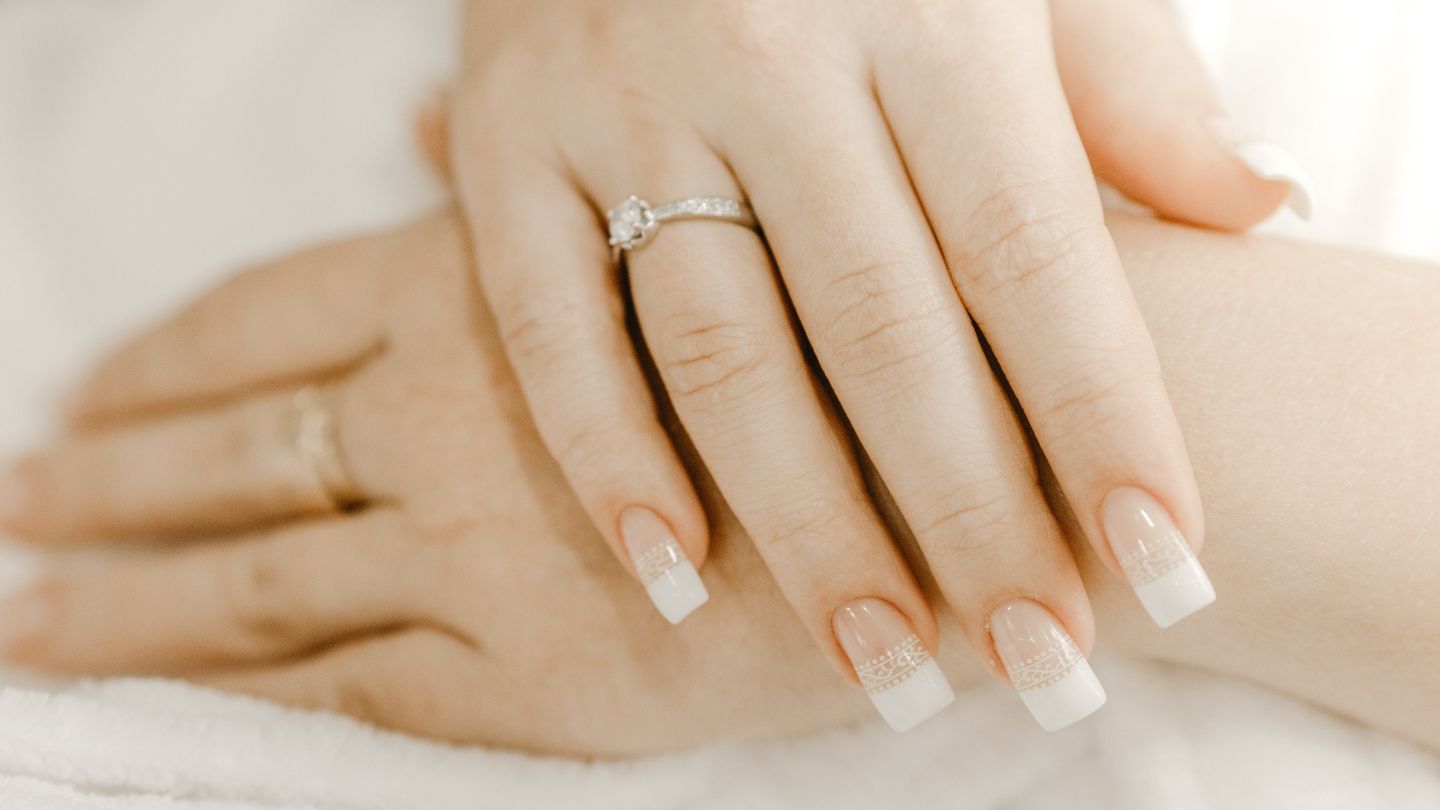
For those who are unfamiliar, let’s start by reviewing what a French manicure is. It’s characterized by natural, long or medium-length nails, usually slightly square or rounded. The base of the nail is painted with a very discreet transparent or pinkish varnish, while a white strip is applied to the free edge of the nail. The result is a perfectly clean look that complements all outfits and occasions.
The color twist: the color French manicure
As its name suggests, the color French manicure adds a touch of fantasy to the traditional neutral tones of the classic model. This technique involves replacing the famous white stripe with a brighter color, or even several shades or patterns, offering a multitude of creative possibilities.

The choice of color
As with a classic manicure, it’s essential to select the right color for your French manicure. The choice will obviously depend on your personal tastes and the occasion on which you plan to wear your new manicure. For example, you could opt for pastel shades for a soft, romantic occasion, or bright colors for an evening out with friends.
Feel free to draw your inspiration from current trends: chalkboard, color manicure, nails, flower gel, acrylic roses… Give free rein to your creativity and choose a color that suits you and makes you stand out.
Application of coloured varnish
To achieve a colored French manicure, you’ll need a transparent base, a colored nail polish and, if necessary, a fine brush for patterns. Start by applying a coat of clear nail polish all over your nails to protect them and make it easier for the color to adhere. Wait for the base coat to dry thoroughly before moving on to the next step.
Using the colored nail polish, carefully draw a thin, even stripe along the free edge of each nail. Don’t hesitate to use a self-adhesive guide to make this step easier if you feel a little uncomfortable. For best hold, apply two thin coats rather than one thick one. Allow to dry thoroughly.
Ideas for personalizing your color French manicure
Once you’ve mastered the basics, all that’s left to do is let your imagination run wild to create a manicure that suits you. Here are a few suggestions to vary the pleasures:
- Two-tone: Combine two complementary shades for an original, contrasting result. First, apply a fairly wide band of color, then a second band of another color on top, but slightly thinner, so that both shades are visible.
- With patterns: A fine brush and varnish in different shades are all you need to create a variety of patterns on the free edge of the nail. Use your patience and skill to draw lines, polka dots, flowers or other shapes as you wish.
- As a gradient: superimpose several shades from the same chromatic family, starting from the free edge and working your way to about halfway up the nail, blending them to achieve a gradual, harmonious effect.
Now you’ve got all you need to create a beautiful color French manicure. Take the time to refine your technique and explore different styles and colors to find the perfect combo. One thing’s for sure: this original, whimsical manicure will leave no one indifferent!